

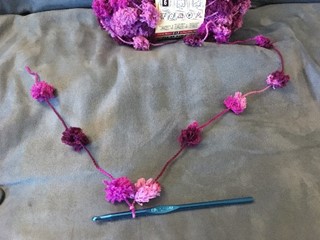
Isn’t that just the most ridiculously fun name for a yarn?
I was out shopping with my mom at a dollar store called “Real Deals” in upstate NY. This store gets all sorts of things—I’m not sure from where—and sells it all for 1$ or less. So, all these skeins of yarn? Yep! One dollar a piece! You Cannot. Beat. That! So, what did I do? I of course bought nearly all of it with a children’s area rug in mind. (Ok, so maybe not quite nearly all, but at least 24 skeins!) But when I started working with it I realized that there was a little bit of a learning curve involved with actually using it. I fiddled with it this way and that, and finally decided to make granny squares with it using a stitch in the gap technique that I could feel rather than relying on sight alone since all the fluff of the “pomps” (or maybe they are “doodles”), got in the way of seeing what I was doing. Except for the difficulty of not being able to see very well what you are doing; this yarn is actually super fun to work with because it is so soft and fluffy! I could just imagine my littles flopping down on a soft cushy rug, rolling all over it and squishing their little toes into the fluffs.
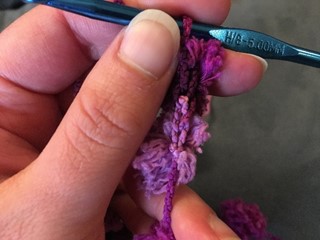
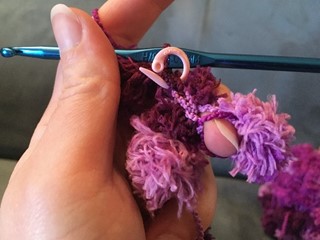
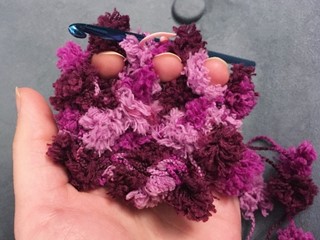
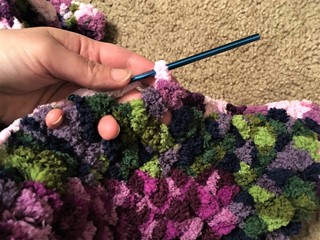
The other tricky part is that you can only work with the string in between the fluff balls. I discovered, that with a size 8H crochet hook I could do one single crochet stitch or two chain stitches in between each fluff ball. So, I started a granny square by first making slip knot close to the working side of one of the fluffs, and then chaining 4. I then connected my chain to make a circle with a slip stitch and chained 1. I placed a stitch marker in that chain before moving on to my first row of the granny square.


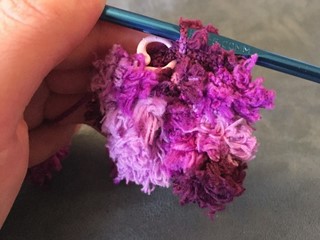
The first row started with a single crochet into the circle that I just created. I chained 2, and then made another single crochet into the circle. I did this 3 more times so that I had a little square forming and could feel 3 corner holes. The fourth corner hole was created by the last chain 2 that I connected with a slip stitch to the stitch that the marker was in. After connecting that first round, I chained 1 and moved the stitch marker up into that stitch.

For the second row, I single crocheted twice into the first corner to the left, chained 2, and then repeated the two single crochets on the other side of the corner. I chained 2 before moving on to the next corner, and then just repeated what I had done with the first corner all around the square. So, if you are familiar with crochet patterns, that sequence would look something like this: (2sc, ch 2, 2sc, ch 2). To finish the second row, I connected the last chain 2 to the stitch that my stitch marker was in, just like before, and chained one and then moved the marker up into that stitch before moving on to the next row.
For the third row there were now 3 holes on each side of my square: corner, middle, and corner.

In each hole I single crocheted 2x and then chained 2 before moving on to the next hole. On the corners I single crocheted 2x, chained 2 and then single crocheted 2x again to start the next side. I finished this row in the same way as the previous rows and from here I just continued in this pattern—each consecutive row adding another hole along each side—until I had eleven holes per side (counting from the corner hole across to the next corner hole).

I found that one skein of Red Heart Pomp-a-Doodle yarn 100g 54 yds. would be just about perfect for this number of rounds. Even though they should be identical skeins, I did find that some were slightly longer than others and I did have to piece a couple of skeins together to get just the last couple of stitches in for some of my granny squares.
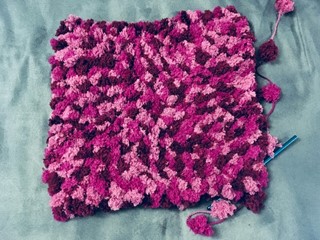
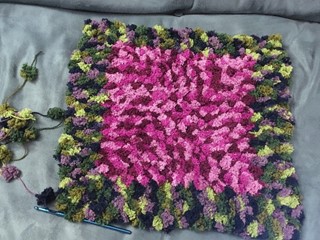
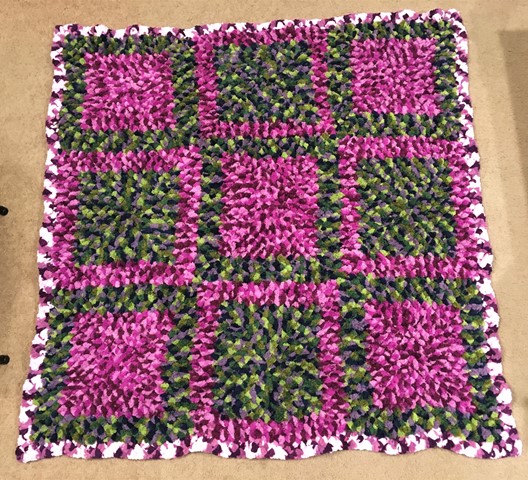
I didn’t stop at 11 holes though. I wanted to make two toned squares that were even larger, and I wanted to be able to alter which color I started with so that when I connected them up they would (hopefully) look really cool. So, when I had completed the last round with 11 holes in each side I swapped colors by making a square knot with the new and the old yarn, and then just continued with my pattern until I had depleted the new skein and completed 4 more rows, making the new hole count per side 15. At that point I just tied it off and set it aside until I had enough grannies to start the assembly.


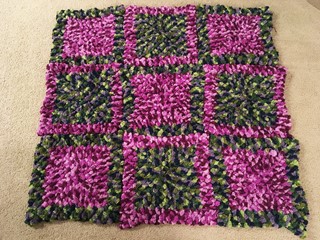
I had originally thought a rectangle would be a good shape because most rooms are not square and the girl’s room is long and narrow, but after consulting with the hubs, Mr. Tech, I decided to go square because his opinion was that square made more sense with the color sceme of alternating colors (but he didn’t really care either way to be honest). So square it is and I liked the way it looked all laid out.

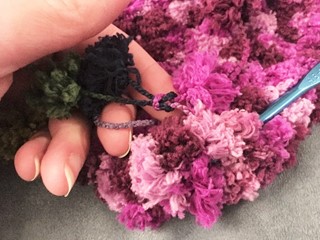
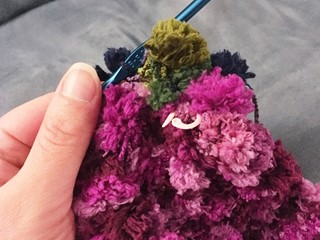
I used the “African Violet” green blend color to connect the squares by putting right sides together and crocheting them together using the same stitch technique as the grannies themselves. Single crochet 2 in the corner holes, chain 2 then single crochet 2 in the next gap—going through the holes of both squares at the same time to connect them together—until I got to the other corner holes on that side where I tied it off and moved on to joining the other edge of the middle square to the next square in the row. When I had completed the assembly of the 3 rows I then did the same thing along the long edges. At the spots where the squares connected at the corners from the first joining step I single crocheted twice in the first corner, and then just skipped right into single crocheting twice in the next corner without the chain 2 in between. I think this helped to reduce bulk at the corners.


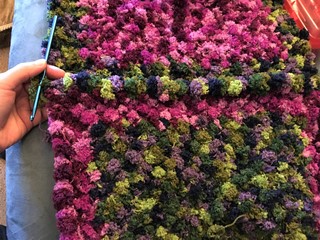
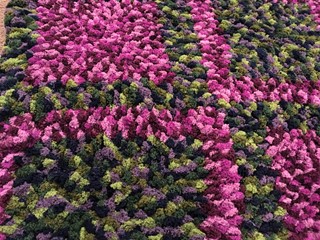
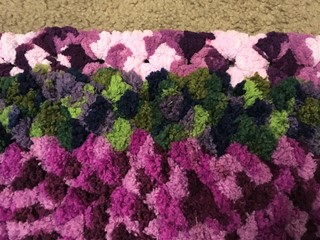
Then I took some time to push the fluffs from the seems to the top side so that it was smoother and had more of a finished look. Here is a before and after:


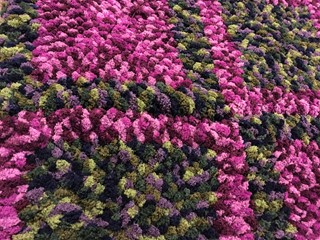
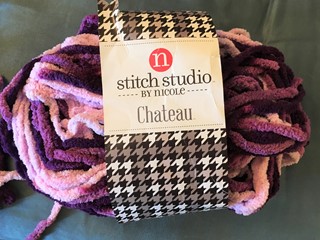
When I was at A.C.Moore recently I found this big squishy yarn that had really similar colors to the “Plush Plum” pomp-a-doodle yarn and I thought that it might just be the perfet yarn to border my rug! This particular color is called “Royal Purple”. When I got it home I was not disappointed! The light purple is lighter than the lightest purple of the pomp-a-doodle, but the dark purples match almost identically! And it is the same squishy fluffly feeling.

After some fiddling I decided to go with 3 single crochets in each hole with 1 chain in between. When I got to the corners I just did 3 single crochets, chain 2 and then turn to do 3 more single crochets to start the next edge. I discovered that crocheting the boarder with the right side facing me helped to correct the edge curl that the grannys have. I did 2 rows all around like this and then flipped it so that the wrong side was facing me for the 3rd and last boarder row.


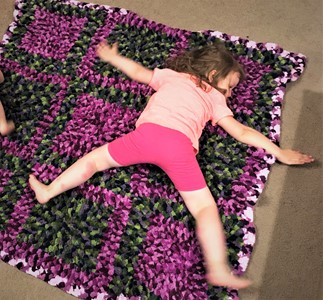
And here is the finished children’s area rug! The edges did come out a little bit ripply, so if I were to do it again I would probably reduce my number of single crochets that I used in the border to 2 per hole instead of 3. It may have worked out better if I had just stuck with my 2 single crochets and 2 chains, but I guess I’ll never know unless I do it again since I don’t see myself taking it out to fix it—ha! If anyone wants to give it a try let me know how it works out for you!

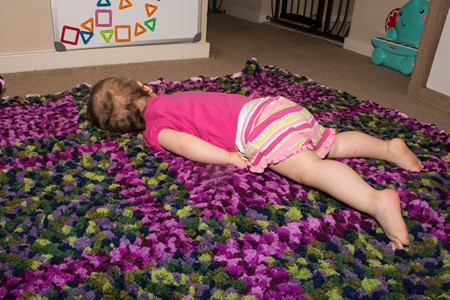
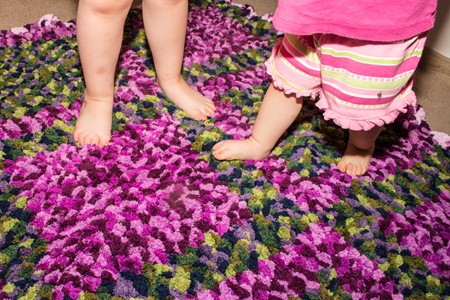
And if you were wondering what the girls’ reaction was: there was much toe squishing and blissful snuggling!


If you noticed the red splotches on the back of El’s leg yes they are bug bites. Stay tuned for one of my next diy’s which will be an “I Hate Bitey Bugs!” spray once I get my citronella essential oil in my next order from Young Living! I can’t wait!
Until next time,
Happy crafting!

4 thoughts on ““Pomp-a-Doodle””
I love this, Audrey. Especially the fact that it can go in the washer and dryer! Doesn’t look too difficult once you get the feel of the yarn.
So glad to see you’e sharing your creations!
Love this!
I love this Squishy Pomp-a-Doodle rug! Nicely done, Audrey!
Good job, Audrey! This is great!